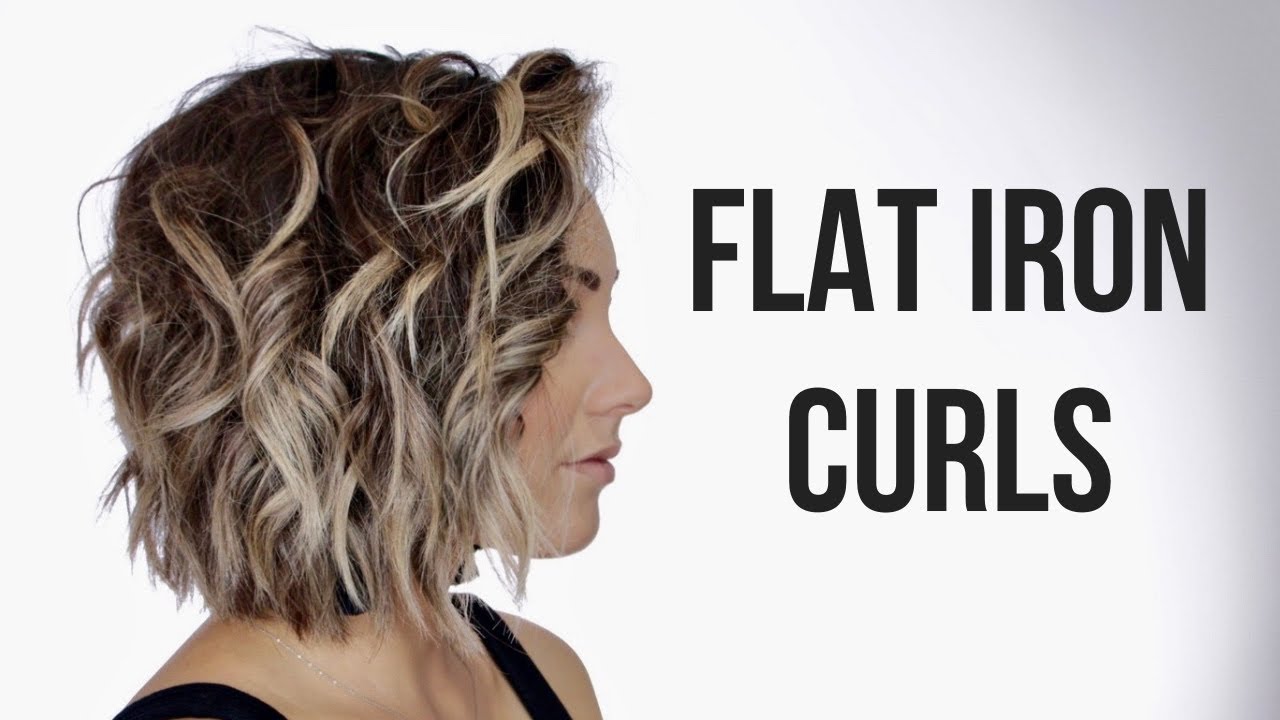
Have you ever wondered how to curl hair with a flat iron? Well, you're in luck because this humble tool can do so much more than just straighten your locks. A flat iron is like a Swiss Army knife for hairstyling—it's versatile, easy to use, and can give you those gorgeous curls without needing a fancy curling wand. If you're tired of bulky tools or want to master a new skill, stick around, because we're about to share some game-changing tips!
Let’s face it, not everyone has the time or budget to buy every single hair tool out there. But here's the thing—a flat iron is your secret weapon. With a little practice and the right technique, you can create everything from loose beachy waves to tight curls that'll make people think you spent hours at the salon. And guess what? You don’t need any special skills to pull it off.
Before we dive into the nitty-gritty of curling your hair with a flat iron, let’s address the elephant in the room: is it safe? Absolutely! As long as you follow the right steps and use heat protectant, you can achieve salon-quality curls without damaging your hair. So grab your flat iron, and let's get started!
Read also:Tana Mongeau Boyfriend The Ultimate Guide To Love And Relationships
Why Use a Flat Iron for Curls?
Alright, so why would you want to use a flat iron when curling wands are specifically designed for curls? Great question! The truth is, flat irons are super versatile. They come in different sizes, materials, and even temperature settings, making them perfect for experimenting with various hairstyles. Plus, they’re typically more affordable and easier to store than bulky curling tools.
Using a flat iron also gives you more control over the curl size and shape. Want loose waves? Tight spirals? A flat iron lets you decide exactly how you want your curls to look. And let’s be honest, who doesn’t love multitasking? You can straighten AND curl with one tool—talk about efficiency!
Choosing the Right Flat Iron
Not all flat irons are created equal. When it comes to curling your hair, the type of plate material and size matter. Ceramic plates are ideal because they distribute heat evenly, reducing the risk of damage. Tourmaline-coated plates are another great option since they minimize frizz and add shine.
As for size, a 1-inch or 1.5-inch flat iron works best for curling. Anything too small might take forever, while larger plates can make it tricky to create precise curls. And don’t forget to check the temperature settings! Adjustable heat ensures you can customize the level of heat based on your hair type.
Preparing Your Hair
Before you even think about touching that flat iron to your hair, preparation is key. Start by washing and conditioning your hair as usual. Once it’s dry, apply a heat protectant spray or serum. This step is non-negotiable if you want to keep your hair healthy and shiny.
Next, section your hair into manageable parts. This will help you work through each piece evenly and avoid missing spots. If you have long hair, consider clipping the top sections out of the way so you can focus on one layer at a time.
Read also:Unleash Your Inner Pirate The Ultimate Guide To One Piece Gifts
Pro Tip: Textured Spray
For extra hold and definition, mist your hair with a texturizing spray before curling. This will give your curls more grip and make them last longer. Plus, it adds a bit of beachy texture that looks effortlessly chic.
How to Curl Hair with Flat Iron: Step-by-Step Guide
Ready to transform your locks? Follow these simple steps to achieve flawless curls:
- Step 1: Turn on your flat iron and set it to the appropriate temperature for your hair type. Fine hair needs lower heat (around 300°F), while thick or coarse hair can handle higher temps (up to 400°F).
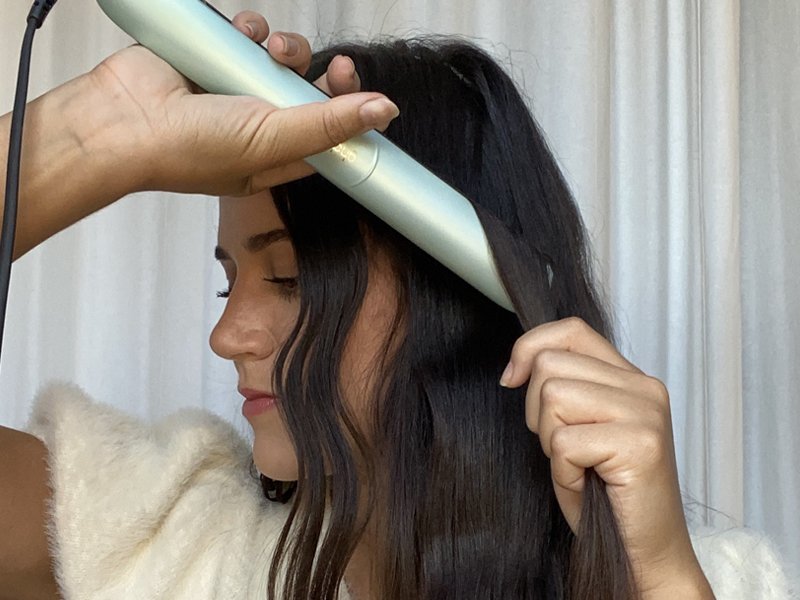
- Step 2: Take a small section of hair, about 1-2 inches wide, starting from the bottom layer.
- Step 3: Clamp the flat iron near the roots and wrap the section of hair around the iron in a smooth, even motion. Hold for 5-10 seconds, depending on your hair thickness.
- Step 4: Release the hair and let it fall naturally. Repeat this process for each section until you’ve curled all of your hair.
- Step 5: Once you’re done, run your fingers through your curls to loosen them up and create a more natural look.
And there you have it—perfect curls in no time!
Common Mistakes to Avoid
Even the most experienced stylists make mistakes sometimes. Here are a few things to watch out for when curling your hair with a flat iron:
- Not Using Heat Protectant: Skipping this step can lead to serious heat damage, so always apply a protectant before styling.
- Over-Processing: Don’t curl the same section of hair multiple times unless absolutely necessary. This can cause breakage and split ends.
- Using Too Much Pressure: Applying too much force can flatten your curls and ruin the texture. Let the heat do the work instead.
- Forgetting to Cool Set: Allow your curls to cool completely before touching them. Otherwise, they may lose their shape.
Creating Different Curl Styles
One of the coolest things about using a flat iron is the variety of styles you can achieve. Here are a few ideas to inspire your next hairstyle:
Loose Waves
For a relaxed, beachy vibe, wrap larger sections of hair around the flat iron and hold for just a few seconds. Run your fingers through the curls afterward to break up the pattern and create a more natural look.
Tight Spirals
For tighter curls, use smaller sections of hair and wrap them tightly around the iron. Hold for a bit longer to ensure the curls set properly. Finish with a light hairspray to keep everything in place.
Half-Up, Half-Down
Combine curls with a sleek updo for a chic yet playful hairstyle. Simply curl the bottom half of your hair and pull the top section into a bun or ponytail.
Tips for Maintaining Your Curls
Now that you’ve achieved your dream curls, how do you keep them looking fresh all day? Here are some expert tips:
- Sleep on a Silk Pillowcase: This reduces friction and prevents your curls from getting tangled or flattened overnight.
- Use a Curl Defining Product: Spritz a lightweight mousse or gel on your curls to enhance their shape and add shine.
- Avoid Touching Your Hair: The oils from your hands can weigh down your curls and make them look greasy.
- Refresh with Dry Shampoo: If your curls start to lose volume, spritz a bit of dry shampoo at the roots to give them a boost.
Addressing FAQs About Flat Iron Curls
Still have questions? We’ve got you covered. Here are answers to some common queries:
Can I Use a Flat Iron on Short Hair?
Absolutely! Short hair can benefit from flat iron curls just as much as long hair. Focus on curling the ends for a polished look.
How Often Should I Use Heat Styling Tools?
Try to limit heat styling to once or twice a week to prevent damage. In between, opt for air drying or using diffusers.
What’s the Best Heat Protectant?
Look for products that contain keratin or argan oil for maximum protection and shine. Always choose a formula that suits your hair type.
Conclusion: Master the Art of Flat Iron Curls
So there you have it—everything you need to know about how to curl hair with a flat iron. With the right techniques and a little practice, you’ll be rocking stunning curls in no time. Remember to prep your hair properly, use the correct tools, and avoid common mistakes for the best results.
Don’t forget to share your newfound skills with friends and family. Who knows, you might just become the go-to hair stylist in your circle! And if you have any questions or tips of your own, drop them in the comments below. We’d love to hear from you!
Table of Contents